Friday, April 22, 2011

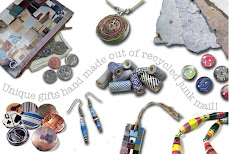
Earth Day Discount! 20% OFF Junk Mail Gems this weekend!

Happy Earth Day!! 

In honor of Earth Day this year, I am offering all of my loyal readers 20% off your Junk Mail Gems order! Just enter the coupon code "EARTH2011" at checkout! 

I just recently switched my entire site over from Paypal to Google Payments, and one main reason was so that I would have this ability to offer coupon codes and promotions.  So, this is my first crack at a coupon code.  Hopefully it works...if not, please let me know! ;-)  There are NO minimum orders required, and this coupon is good all weekend, NOW through Easter, April 24, 2011! (One coupon use per customer) Use it to get a jump on your Mother's Day shopping, or just treat yourself for being the earth friendly bargain hunter you are!

And since I don't have anything else amazing to share, I'm going to mooch off of some other bloggers who were more on-the-ball this Earth Day and prepared more fun material for you...

ReadyMade posted a link to a great tutorial for making your own plantable paper!  Very cool.

Hop on over to Inhabitots for 5 fun ways to celebrate Earth Day with your kids!

However you choose to celebrate, have fun! :-)

Monday, April 4, 2011

My Junk Mail Gems Inspired Bathroom!

We recently moved to a new house, which for me means that I get to start all over with painting and decorating!  That sounds like a sarcastic remark, but I really LOVE making over rooms.  Sometimes over and over.  Anyway, when the time came that I could start painting, my first target was the downstairs bathroom, which was all decked out in pink, purple, blue and yellow sponge painting...

...which I'm sure was perfectly lovely for the previous owner, but just didn't quite scream "me."  Since this tiny bathroom is right next door to my studio where all of Junk Mail Gems happens, I thought I'd do a Junk Mail Gems inspired theme.

While moving into my new studio I came across my old Danny O calendar that I couldn't bring myself to toss because the images are so fun.  I thought the car and camper went well together so I tore them out, trimmed them, and put them in a pair of Ikea frames I had picked up at a garage sale last summer for $0.50 cents each...

I decided to go with neutral walls (very off character for me, I know!), but I wanted the colorful accessories to pop.  I did use a little bit of color on the base of the cabinet, on the light fixture and a wood board that had a bunch of towel hooks on it.  It's all stuff that we plan to remove someday and totally remodel, but until then, a little paint made it all more bearable for me!


I painted the wood cabinet, and added a strip of decoupaged junk mail around the sink for a little color.  I simply cut a couple rectangles of cardboard from an old box, decoupaged them, and then stuck 'em on the face of the cabinet.  I think it turned out pretty cool!  It's still sortof temporary, but then again the whole bathroom is according to my husband, so I figured anything goes in here...


I broke out the Mod Podge once again to decoupage colorful junk mail over the old switch plate covers.

I also picked up an updated pair of brushed nickel knobs for the wall cabinet (which I plan to paint too in the near future), and a towel ring since there was no place for a hand towel.  The mirror I replaced with a much larger one I had found at Goodwill for $14 back when I was staging our old house for sale.
Yeah, that's one tight little corner to do your business in.  It's fine for me and a little claustrophobic for my hubby, but it gets the job done.  An even slightly large person would likely get stuck in here, which is one reason we plan to gut the thing eventually! The bottom half of the walls under the chair rail had some kind of wall covering that didn't lend itself well to painting, so I haven't touched it...yet.

So, there you have it...a room inspired by junk mail recycling!!  It's still a work in progress, and I've got my eye on a recycled flip flop floor mat that I'd love to put in here someday...for now it resides safely in my Amazon wish list!  :-)

Tuesday, March 1, 2011

Biodegradeable Balloon Bowls by Gitta Gschwendtner

 Aren't these bowls amazing?! At first glance they make me think of a geode...rough and neutral on the outside, yet brilliant on the inside.  Can you believe they are made simply of a latex balloon, with an outer shell of latex and sawdust?!
 The bowls and instructions to create your own were created by Gitta Gschwendtner as a part of TEN Plan.  "TEN" is a collective of 10 designers who have exhibited various environmentally sustainable projects, along with plans for you to try it yourself.  Visit the website to check out these bowls, among other projects, and download instructions to make your own!


(via Cobbled Together by Brenna...by the way, Brenna, I think yours are even more amazing!!!)

Sunday, February 27, 2011

Junk Mail Gems in the Press: Midwest Living Magazine

I was pretty excited to find the latest copy of Midwest Living in my mailbox last week, and especially excited to see some of my letter magnets on page 103.  Writer Hannah Agran found a very cool selection of green gifts and I am honored to be among them!  Hannah ordered some of my letter magnets a while back to spell the word "Green" for the article heading, which I thought was very creative.  Another fun addition to my press page!

Many thanks to Hannah Agran and photographer Jay Wilde for their great work and for including me in this article!  Be sure to check out Midwest Living magazine's website as well.  I really enjoyed paging through this issue and all of it's springtime ideas and imagery...some day very soon this snow will melt and we'll see the "spring joys" again that they showcase on the cover of the issue!!

Friday, February 18, 2011

Magazine Page Valentine Pockets

Hello everyone! I know, it's been forever since I've blogged...we recently moved our home, our family, our dogs, and coincidentally, my business.  So, things have been a little crazy, but we are getting settled again and it's time to blog some more!


I realize this is totally belated, being that Valentine's day is over, but I wanted to share this fun tutorial from Unplug Your Kids.  It just seems so fitting for the Junk Mail Gems blog because it uses recycled magazine pages!  Just a little something to tuck away until next year...although who says you can only send love notes on Valentine's day?  Make one today!  :-)

Saturday, January 1, 2011

My Recycled Play Doh Necklace!

Happy New Year everyone!!  It's been a little while since I've posted, as I've been sucked into the whirling vortex that is the holidays around my house.  Luckily we took our home off the market just in time for Thanksgiving (after 7 months of trying to sell).  However, things were pretty busy between Thanksgiving travel, hosting family for Christmas, and then my son's 3rd birthday!  (Check out this post on my ID Mommy blog if you're looking for ideas for your own DIY choo-choo train birthday party!)

Anyway, now that I'm "back," I wanted to share one of the homemade Christmas gifts I gave this year that was done in the spirit of recycling.   


This really was an experiment with something that I'm sure nobody would think to recycle, but it came out pretty sweet. If you have little kids who love Play-Doh like I do, you may recognize the little colored bits in this pendant as being those tiny pieces of dried up Play-Doh that get stuck in the perforated plastic heads of those barber shop guys.


Yup, I was just nutty enough to see an art project in these little dried up Play-Doh scraps.  I filled a silicone mini muffin pan with a little resin, poured in the Play-Doh bits, poured in some more resin, and out popped this cool, shiny disc.  I bent a loop with some jewelry wire, glued it to the back, attached a cord, and gave one to my sister.  Oh, and I have one in my jewelry box now too.  It's definitely a conversation piece!

 Here's a shot of the back.  I made a little loop with copper wire, and then made a pretty swirl out of one end, giving me a surface to glue it to the back with some strong epoxy.

 I like to make little tags for my homemade gifts, to give them that "brand new" feeling you get when you buy something from a store.  This one wasn't fancy as I just did hand lettering, but you can easily make a little hang tag by folding a piece of paper, cutting the bottom two corners at an angle, running a strip of glue across the top and punching a hole.  You know, in case you wanted to hang it on a store rack or something.  ;-)

 I really just put this tag on so I could note what the heck this thing was made out of!  But, I also really like making more "professional" looking tags on the computer too.  I think next year I'll make little price tags that say "$1,000.00" or "priceless" or something like that.  ;-)

Bet 'ya didn't think you could turn crumbs of dried up Play-Doh into beautiful jewelry now, did you?!

Saturday, November 27, 2010

Pretty Pencil Box Pendant

I just looked through my latest Uncommon Goods catalog and just had to share this awesome pendant, made with slices of real colored pencils.  I just LOVE how they combined the round cross-sections on bottom with the angled cuts on the top.
I have the resin and molds to make something like this, but am not sure I'd want to attempt the precise cuts it takes to get these all sliced just right.  These are hand made in Massachusetts by someone who knows what they are doing!  What a great way to use up some of those little pencil stubs that are too short to draw with!

Pick one up for $65 at Uncommon Goods...they also have matching pins in a circle or heart shape ($38), as well as a teardrop necklace ($60).

(Here's a previous post with more colored pencil jewelry, too)
Related Posts with Thumbnails

What's going on in the world of Junk Mail Gems, along with other cool, hand-made "green" products, DIY projects, and more!