Saturday, January 1, 2011

My Recycled Play Doh Necklace!

Happy New Year everyone!!  It's been a little while since I've posted, as I've been sucked into the whirling vortex that is the holidays around my house.  Luckily we took our home off the market just in time for Thanksgiving (after 7 months of trying to sell).  However, things were pretty busy between Thanksgiving travel, hosting family for Christmas, and then my son's 3rd birthday!  (Check out this post on my ID Mommy blog if you're looking for ideas for your own DIY choo-choo train birthday party!)

Anyway, now that I'm "back," I wanted to share one of the homemade Christmas gifts I gave this year that was done in the spirit of recycling.   


This really was an experiment with something that I'm sure nobody would think to recycle, but it came out pretty sweet. If you have little kids who love Play-Doh like I do, you may recognize the little colored bits in this pendant as being those tiny pieces of dried up Play-Doh that get stuck in the perforated plastic heads of those barber shop guys.


Yup, I was just nutty enough to see an art project in these little dried up Play-Doh scraps.  I filled a silicone mini muffin pan with a little resin, poured in the Play-Doh bits, poured in some more resin, and out popped this cool, shiny disc.  I bent a loop with some jewelry wire, glued it to the back, attached a cord, and gave one to my sister.  Oh, and I have one in my jewelry box now too.  It's definitely a conversation piece!

 Here's a shot of the back.  I made a little loop with copper wire, and then made a pretty swirl out of one end, giving me a surface to glue it to the back with some strong epoxy.

 I like to make little tags for my homemade gifts, to give them that "brand new" feeling you get when you buy something from a store.  This one wasn't fancy as I just did hand lettering, but you can easily make a little hang tag by folding a piece of paper, cutting the bottom two corners at an angle, running a strip of glue across the top and punching a hole.  You know, in case you wanted to hang it on a store rack or something.  ;-)

 I really just put this tag on so I could note what the heck this thing was made out of!  But, I also really like making more "professional" looking tags on the computer too.  I think next year I'll make little price tags that say "$1,000.00" or "priceless" or something like that.  ;-)

Bet 'ya didn't think you could turn crumbs of dried up Play-Doh into beautiful jewelry now, did you?!

Saturday, November 27, 2010

Pretty Pencil Box Pendant

I just looked through my latest Uncommon Goods catalog and just had to share this awesome pendant, made with slices of real colored pencils.  I just LOVE how they combined the round cross-sections on bottom with the angled cuts on the top.
I have the resin and molds to make something like this, but am not sure I'd want to attempt the precise cuts it takes to get these all sliced just right.  These are hand made in Massachusetts by someone who knows what they are doing!  What a great way to use up some of those little pencil stubs that are too short to draw with!

Pick one up for $65 at Uncommon Goods...they also have matching pins in a circle or heart shape ($38), as well as a teardrop necklace ($60).

(Here's a previous post with more colored pencil jewelry, too)

Friday, November 19, 2010

DIY Recycled Ornaments from "Michele Made Me"

Check out these pretty plastic bottle ornaments from Michele Made Me, along with instructions to make them yourself!

She also has another tutorial to make these adorable little greenhouse ornaments from recycled plastic.  Love them!  Plus, who doesn't want to gaze into a tropical little greenhouse when there are inches of snow on the ground? Her ornament tutorials appear to be an ongoing series...can't wait to see what she comes up with next!  Thanks, Michele!!

Thursday, November 11, 2010

"Fantastic Recycled Plastic: 30 Clever Creations to Spark Your Imagination"

I just came across this fun book over at Craftgossip, where you can read a review and even post a comment for a chance to win your own copy!  I have these bins in my studio that are full of recycled materials, waiting to be repurposed...wine corks, bottle caps, and of course junk mail.  I also have a bin full of miscellaneous colorful plastic parts...lids from bottles, bread bag tabs, and even the tops of spice jars with the little holes in them.  I've been waiting for something to inspire me to turn them into something cool, and this seems like a great place to start! 

I haven't seen the book in person myself, but thought I'd share the review over at CraftGossip, and get you all in on a chance to win a copy too!  Good luck!  :-)

Tuesday, October 26, 2010

New Uses for Old Broomsticks!

I picked up a few old magazines from the 1920's the other day for $0.55 cents each at the thrift store, thinking the pages and ads may be fun material to decoupage or make other things with.  Just had to share this little article on "New uses for old broomsticks!"

Whether we call it "recycling," "upcycling," "repurposing," "re-using," or "DIY," it's not a new idea! Too bad so many brooms are made from metal tubes now...a lot harder for the average person to convert into something else!

Thursday, October 21, 2010

DIY Scrabble Serving Tray

Just thought I'd share another little project I finished recently...a scrabble themed serving tray!  This will be a Christmas gift to my Grandma, who is both an excellent hostess and Scrabble player, so I think it will fit her well.  Luckily she does not have a computer so I can share this with all of you before Christmas.  ;-)

I picked up this perfect serving tray for $4.99 at Saver's a few weeks ago.  I considered this one perfect for this project for a couple reasons...1) The tray itself is flat, 2) The plastic handles are easily remove-able with a couple screws. I have been scouring the thrift stores for weeks to find an old Scrabble game with no luck...until last weekend when I stopped by a garage sale and found one for $0.25 cents.  Score!!

After giving the tray a good cleaning, I un-screwed and removed both of the plastic handles, with plans to replace them with something more fitting later...


I spread some glue around and stuck down all of the letters.  This tray held one entire game's worth of Scrabble tiles.

Here they sat to dry.

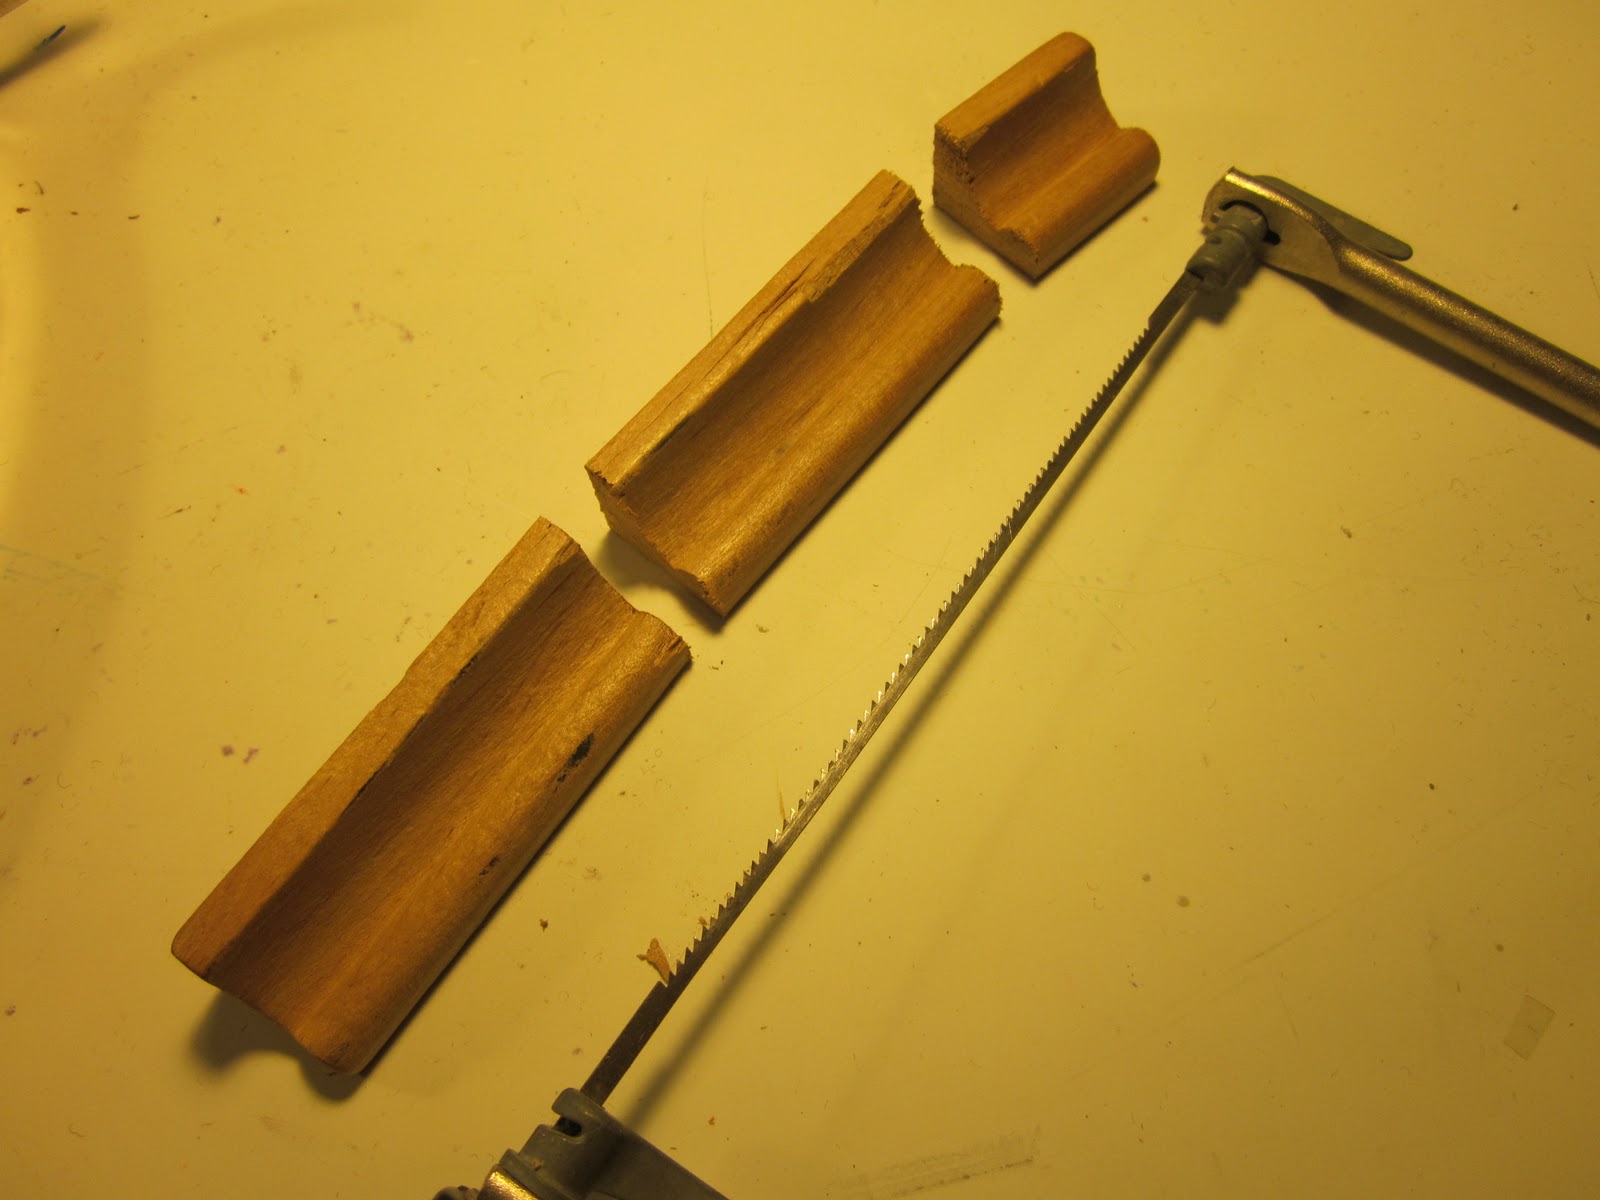
 Next, I thought it would be fun to use the old wood letter trays as new handles.  So, I measured and marked the tray off of the existing plastic handles, and cut them apart with my coping saw.

 Be sure to pre-drill the holes so you don't split the wood when you attach these.

 Once the holes were drilled, I screwed them into place...I think it added a cool touch! 

If you have enough letter tiles left, it may be fun to glue a few into the tray on the handle too.  Maybe even spell something fun.

 The next day, after the glue was really dry, I mixed up a batch of EnviroTex Lite resin to pour over the whole thing.  It's the same stuff I used on the top of my train table.

 I used a wooden paint stir stick to mix the resin and then to help spread it across the tray, making sure all of the tiles were covered.

 As it dries, check on it every few minutes, and exhale over any bubbles that come to the surface...the carbon dioxide makes them pop so you have a crystal clear coating!

Aaaaand, we're done!  Pretty fun project!  If you didn't want to use clear resin, you could also grout it like a mosaic which would also look very cool.  I'd recommend sealing the tiles in a clear varnish before applying any grout, to ensure that they wipe clean and the wood grain doesn't hold onto any haze from the grout.

So there you have it...one Christmas present down, many more to go!

Thursday, October 14, 2010

Cool Water Bottle Wreath from "Michele Made Me"

Check out this great wreath, made from plastic water bottles!!  Nice work, Michele! :-)  I just stumbled on her blog and will be adding it to my list of favorite links for sure!
Related Posts with Thumbnails

What's going on in the world of Junk Mail Gems, along with other cool, hand-made "green" products, DIY projects, and more!