Showing posts with label Christmas Gifts. Show all posts

Saturday, January 1, 2011

My Recycled Play Doh Necklace!

Happy New Year everyone!!  It's been a little while since I've posted, as I've been sucked into the whirling vortex that is the holidays around my house.  Luckily we took our home off the market just in time for Thanksgiving (after 7 months of trying to sell).  However, things were pretty busy between Thanksgiving travel, hosting family for Christmas, and then my son's 3rd birthday!  (Check out this post on my ID Mommy blog if you're looking for ideas for your own DIY choo-choo train birthday party!)

Anyway, now that I'm "back," I wanted to share one of the homemade Christmas gifts I gave this year that was done in the spirit of recycling.   


This really was an experiment with something that I'm sure nobody would think to recycle, but it came out pretty sweet. If you have little kids who love Play-Doh like I do, you may recognize the little colored bits in this pendant as being those tiny pieces of dried up Play-Doh that get stuck in the perforated plastic heads of those barber shop guys.


Yup, I was just nutty enough to see an art project in these little dried up Play-Doh scraps.  I filled a silicone mini muffin pan with a little resin, poured in the Play-Doh bits, poured in some more resin, and out popped this cool, shiny disc.  I bent a loop with some jewelry wire, glued it to the back, attached a cord, and gave one to my sister.  Oh, and I have one in my jewelry box now too.  It's definitely a conversation piece!

 Here's a shot of the back.  I made a little loop with copper wire, and then made a pretty swirl out of one end, giving me a surface to glue it to the back with some strong epoxy.

 I like to make little tags for my homemade gifts, to give them that "brand new" feeling you get when you buy something from a store.  This one wasn't fancy as I just did hand lettering, but you can easily make a little hang tag by folding a piece of paper, cutting the bottom two corners at an angle, running a strip of glue across the top and punching a hole.  You know, in case you wanted to hang it on a store rack or something.  ;-)

 I really just put this tag on so I could note what the heck this thing was made out of!  But, I also really like making more "professional" looking tags on the computer too.  I think next year I'll make little price tags that say "$1,000.00" or "priceless" or something like that.  ;-)

Bet 'ya didn't think you could turn crumbs of dried up Play-Doh into beautiful jewelry now, did you?!

Thursday, October 21, 2010

DIY Scrabble Serving Tray

Just thought I'd share another little project I finished recently...a scrabble themed serving tray!  This will be a Christmas gift to my Grandma, who is both an excellent hostess and Scrabble player, so I think it will fit her well.  Luckily she does not have a computer so I can share this with all of you before Christmas.  ;-)

I picked up this perfect serving tray for $4.99 at Saver's a few weeks ago.  I considered this one perfect for this project for a couple reasons...1) The tray itself is flat, 2) The plastic handles are easily remove-able with a couple screws. I have been scouring the thrift stores for weeks to find an old Scrabble game with no luck...until last weekend when I stopped by a garage sale and found one for $0.25 cents.  Score!!

After giving the tray a good cleaning, I un-screwed and removed both of the plastic handles, with plans to replace them with something more fitting later...


I spread some glue around and stuck down all of the letters.  This tray held one entire game's worth of Scrabble tiles.

Here they sat to dry.

 Next, I thought it would be fun to use the old wood letter trays as new handles.  So, I measured and marked the tray off of the existing plastic handles, and cut them apart with my coping saw.

 Be sure to pre-drill the holes so you don't split the wood when you attach these.

 Once the holes were drilled, I screwed them into place...I think it added a cool touch! 

If you have enough letter tiles left, it may be fun to glue a few into the tray on the handle too.  Maybe even spell something fun.

 The next day, after the glue was really dry, I mixed up a batch of EnviroTex Lite resin to pour over the whole thing.  It's the same stuff I used on the top of my train table.

 I used a wooden paint stir stick to mix the resin and then to help spread it across the tray, making sure all of the tiles were covered.

 As it dries, check on it every few minutes, and exhale over any bubbles that come to the surface...the carbon dioxide makes them pop so you have a crystal clear coating!

Aaaaand, we're done!  Pretty fun project!  If you didn't want to use clear resin, you could also grout it like a mosaic which would also look very cool.  I'd recommend sealing the tiles in a clear varnish before applying any grout, to ensure that they wipe clean and the wood grain doesn't hold onto any haze from the grout.

So there you have it...one Christmas present down, many more to go!

Saturday, December 12, 2009

DIY Christmas Gift Idea: Community Center Art Classes!

For the past 6 weeks, thanks to the suggestion of my husband, I've been really enjoying some pottery classes that I've been taking at my local city's art center. Below is a collage of some of the pieces I've been able to bring home so far...there are still a few left to fire before they are all done!

In addition to creating items to use around my own home, I purposely made some flower pots that I am planning to fill with a little herb or cactus to give as Christmas gifts. My class was on the pottery wheel, however, you can hand make so many things out of clay, including ornaments.

While I know this is probably too late for this holiday season, I wanted to post this as a great way to be green, make your own one-of-a-kind gifts, and support your local community! Check out your own local community center or community college and see if they offer art or craft classes, as many do. It's a really fun way to get out of the house (SO precious to a work-from-home mom!), learn something new, and create original gifts and decor for your own home.

Why not even start now for next year? It would make a great New Year's resolution!

Friday, January 2, 2009

Happy new year!

Happy new year!! I hope you had a wonderful holiday. I thought I'd share a few fun green things that I came across during my own holiday celebrations...

The first is a fun green DIY project idea, and a gift that we received from my aunt. She took a recycled wine bottle, stuffed it full of lights, and topped it off with some foliage and grapes, attached with some green floral tape:

It is such a simple idea and really dresses up your table or buffet nicely for parties, etc!

I also got a few gifts that were wrapped in an eco friendly way. I did not snap photos of them but here are some...

1) A stack of books for my little boy were tied together with a home made fleece scarf (from the same friend who had the great recycled birthday party invites in a previous post). Simply cut a strip of fleece, and then cut some fringes on the ends and you have a cozy, no-sewing-involved scarf!

2) A metal bucket filled with goodies (also for my little guy)...a great way to package gifts, and the bucket can be used for toy storage, sandcastles, or in my little boy's case, a drum!

3) A storage bin full of goodies. The past few years my mom has given each of us "kids" a nice storage bin, with all of our gifts inside. It saves a lot of paper over wrapping such a large box, and who can't use a storage bin?!

Those were just a few interesting ideas I got from my creative friends and family...I'd love to hear if any of you came across any new green holiday ideas this year!

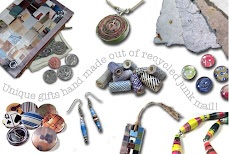
I of course enjoyed giving a few green and home made gifts this year, from hand made soaps to vases out of old plates with sentimental meaning, to hand crocheted stuffed toys, and of course, some Junk Mail Gems jewelry!

Wednesday, December 17, 2008

DIY Christmas Gifts from Inhabitat


Inhabitat posted some really great DIY gifts yesterday...check them out!
My favorites are these cork coasters and trivets above. I have such a huge stash of corks now, I'm trying to figure out how else to use them! The crochet owls are pretty dang cute as well...


This was an earlier post also from Inhabitat, but are so adorable I had to include them as well:

And don't forget to check out all the junk mail diy projects on my page while you're at it!
Related Posts with Thumbnails

What's going on in the world of Junk Mail Gems, along with other cool, hand-made "green" products, DIY projects, and more!